MongoDB startup troubleshooting : “unexpected shutdown”, “Address already in use for port”

I’m having another attempt and building out my cluster today. Following Simon the PiMan’s guides

  1. http://www.simonthepiman.com/beginners_guide_find_my_network_settings.php
  2. simonthepiman.com/how_to_setup_your_pi_for_the_internet.php
  3. http://www.simonthepiman.com/how_to_setup_remote_access.php#raspberrypi

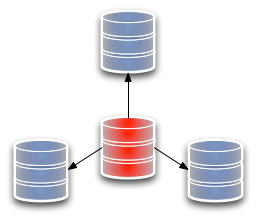
I just want to get one or 2 R Pis connected to the network switch and the Dell (acting as master).

I fire up the Dell and call MongoD (which I haven’t used for a couple of weeks), to get a surprising error:

old lock file: /data/db/mongod.lock.  probably means unclean shutdown recommend removing file and running --repair see: http://dochub.mongodb.org/core/repair for more information

The right way to shut down Mongo

I guess I must have done something wrong the last time I had it open. To ensure a clean shut down, use the mongod –shutdown option, your control script, “Control-C” (when running mongod in interactive mode,) or kill $(pidof mongod) or kill -2 $(pidof mongod).

Finding out/remembering where you installed MongoDB

$ sudo find / -type d -name mongo
This will search  from root (/) for directories named ‘mongo’
Reveals I installed everything to /usr/bin

Find out where you installed the directories for $DBPATH, check the filesize for mongod.lock

$ locate /data/db
/data/db- Note to self, create this in the same tree as the Mongo directories next time!

cd /data/db
ls -l
-rwxr-xr-x 1 stuart stuart 0 Jan  6 22:00 mongod.lock

If the mongod.lock file in the data directory specified by dbpath, /data/db by default, is not a zero-byte file, then mongod will refuse to start.

However, as above, you can see that the filesize is 0 bytes for mongod.lock, so, I’m not quite sure what the problem is.

Repairing MongoDB

$ sudo mkdir /data/db/db0
– Mongo attempts to create a new directoryand move the old/repaired lock file. As I seem to have some ongoing permissions problems, i pre-create this folder.

$ sudo mongod –dbpath /data/db –repair –repairpath /data/db0

Feedback from the shell below suugests it has worked…

stuart@debian:/data/db$ sudo mongod –dbpath /data/db –repair –repairpath /data/db0
Sun Jan  6 22:33:30 Mongo DB : starting : pid = 16652 port = 27017 dbpath = /data/db master = 0 slave = 0  32-bit

** NOTE: when using MongoDB 32 bit, you are limited to about 2 gigabytes of data
**       see http://blog.mongodb.org/post/137788967/32-bit-limitations for more

Sun Jan  6 22:33:30 finished checking dbs
Sun Jan  6 22:33:30  dbexit:
Sun Jan  6 22:33:30      shutdown: going to close listening sockets…
Sun Jan  6 22:33:30      shutdown: going to flush oplog…
Sun Jan  6 22:33:30      shutdown: going to close sockets…
Sun Jan  6 22:33:30      shutdown: waiting for fs preallocator…
Sun Jan  6 22:33:30      shutdown: closing all files…
Sun Jan  6 22:33:30      closeAllFiles() finished
Sun Jan  6 22:33:30      shutdown: removing fs lock…
Sun Jan  6 22:33:30  dbexit: really exiting now

Or, to wipe your data files without preserving the original files, do not use the –repairpath option, as in the following procedure:

  1. Remove the stale lock file:
    rm /data/db/mongod.lock

    Replace /data/db with your dbpath where your MongoDB instance’s data files reside.

    Warning: After you remove the mongod.lock file you must run the –repair process before using your database.

  2. Start mongod using –repair to read the existing data files.
    mongod --dbpath /data/db --repair

    When this completes, the repaired data files will replace the original data files in the /data/db directory.

  3. Start mongod using the following invocation to point the dbpath at /data/db:
    mongod --dbpath /data/db

Port already in use?!

After repairing Mongo by clearing out the old lock, I try to start it afresh.

stuart@debian:/data/db$ mongod
mongod –help for help and startup options
Mon Jan  7 12:01:20 Mongo DB : starting : pid = 17622 port = 27017 dbpath = /data/db/ master = 0 slave = 0  32-bit

** NOTE: when using MongoDB 32 bit, you are limited to about 2 gigabytes of data
**       see http://blog.mongodb.org/post/137788967/32-bit-limitations for more

Mon Jan  7 12:01:20 db version v1.4.4, pdfile version 4.5
Mon Jan  7 12:01:20 git version: nogitversion
Mon Jan  7 12:01:20 sys info: Linux murphy 2.6.32.14-dsa-ia32 #1 SMP Thu May 27 16:19:20 CEST 2010 i686 BOOST_LIB_VERSION=1_42
Mon Jan  7 12:01:20 waiting for connections on port 27017
Mon Jan  7 12:01:20 listen(): bind() failed errno:98 Address already in use for port: 27017
Mon Jan  7 12:01:20 MiniWebServer: bind() failed port:28017 errno:98 Address already in use
Mon Jan  7 12:01:20   addr already in use
Mon Jan  7 12:01:20 warning: web admin interface failed to initialize on port 28017

It seems this is a recognised problem. It seems that if you installed MongoDB the ‘sudo apt-get…’ way then Ubuntu seems to boot a mongo DB on startup (like a Windows service).

Here’s a quick fix here’s to find and kill the Mongo server process and start completely afresh.

Get the process list:

$ ps -eF | grep 'mongo\|PID'

This will return the PID(s) [1776] which can then be used to kill the process and hopefully close the sockets as well.

$ ps -ef | grep ‘mongo\|PID’

UID        PID  PPID  C STIME TTY          TIME CMD
mongodb   1776     1  0 Jan06 ?        00:00:00 /usr/bin/mongod --dbpath /var/lib/mongodb --logpath /var/log/mongodb/mongodb.log --config /etc/mongodb.conf run
stuart   17622 15178  0 12:01 pts/2    00:00:00 mongod
stuart   18021 17854  0 12:10 pts/1    00:00:00 grep mongo\|PID

$ sudo kill-9 1776

Now we’re good to go, I hope, and I can begin the process of networking/connecting!

MongoDB Utils

So, I managed to

a) Clone the SD cards with a successful MongoDB installation
b) Reformat the WinXP Dell to Debian 6.0 and install MongoDB
c) Plug everything into a new 8-port ethernet switch
d) Install PuTTY

…Which should mean I have at least 5 nodes in an available cluster (+ VMs on the Dell). I was just about to install MongoVue on the Dell (which is now becoming the master/control machine) and connect to each node from within MongoVue and browse collections made on each device  – only to find out it runs only on Windows!

In browsing to see if there was a linux version of MongoVue I stumbled across this excellent blog / summary of what’s out there

http://timgourley.com/2010/03/16/tuesday-night-tech-mongodb-ui-edition.html

This tool looks pretty cool for administering clustersImageI’ll give it a shot.

DavidHows @10Gen also recommended that I installed MMS. This is an agent (or python daemon) which polls the internal performance metrics out of your Mongo instances. Its free and is a great help if you’re trying to diagnose performance issues. This should be useful for me, as I’m interested in ETL performance (throughput) depending on how many nodes I have, how the data is sharded, size and type of SD cards etc.

http://www.10gen.com/products/mms
By default, the MMS dashboard displays 9 metrics:

  • Op Counters – Count of operations executed per second
  • Memory – Amount of data MongoDB is using
  • Lock Percent – Percent of time spent in write lock
  • Background Flush – Average time to flush data to disk
  • Connections – Number of current open connections to MongoDB
  • Queues – Number of operations waiting to run
  • Page Faults – Number of page faults to disk
  • Replication – Oplog length (for primary) and replication delay to primary (on secondary)
  • Journal – Amount of data written to journal


‘Cloning’ SD cards

Having gone through a painfully slowly MongoDB installation using scons, which took the best part of a full day on a 32GB SD card and was pretty fiddly, I’m attempting to ‘clone’ my ‘master’ SD card with MongoDB installed using the Win32 Disk Imager we downloaded previously. I’m not sure it’s going to work though, as I cannot see any MongoDB files/folders on the card when I insert it into the SD card reader on my laptop. Here goes anyway!

You can watch a video of how to do it

I hope that it will work, as it will save me 4 days manually installing onto the other 4 Raspberry Pis as detailed in my previous post. I’ll let you know! Looks like it’s going to take about 1/2 hr to read the existing image and I guess a similar amount to write it out to the new SD card

Thanks to Disconnect on the Raspberry Pi forum who states that Windows will only show up the boot partition, not everything else eg the MongoDB install.

UPDATE: it worked!

Successful Debian (6.0) installation

It’s nice working on a 42″ plasma TV in the living room(!) where the internet router is situated. I managed to get a DVI <> HDMI cable for the old Dell Dimension (which  means no more bulky old Dell monitor)

Installed a Debian image onto the previously WinXP Dell, using Unetbootin and a USB drive.

Fun with .tar filesImage

I now have 5 x R Pi with 32GB SD cards and MongoDB installed on Raspbian O/S, plus MongoDB installed on the old Dell.

I have also installed Oracle Virtual Box which lets you create virtual machines relatively easily.

My new 8-port network switch should hopefully come in the post today.
Should be in business!

Don’t forget, you’ll need to configure WiFi access too! Although for the RPi, this was pretty helpful, as was this & this

The Dell is so old it doesn’t have an internal wireless card. Instead I use a wifi dongle
$ lsusb
Bus 001 Device 004: ID 0846:4260 NetGear, Inc. WG111v3 54 Mbps Wireless [realtek RTL8187B]

$ sudo iwlist wlan0 scan | grep ‘BT’
                    ESSID:”BTHub3-WFF6″
ESSID:”BTHub3-F9Q7″
ESSID:”BTWiFi”
ESSID:”BTWiFi-with-FON”
ESSID:”BTOpenzone-H”
ESSID:”BTFON”
ESSID:”BTHomeHub2-GMGT”

$ man 5 interfaces
$ man 8 wpa_supplicant
$ man 8 iwconfig
$ man 8 iwlist

Take a look/install these Unix GUIs to help with setting up a network connection

  • kmanager
  • wicd

Distribution, Replica sets, Master-Slave

I’m just getting to grips with distributed database terminology pp130 in “MongoDB The Definitive Guide”

Master-Slave Replication

Master-slave replication  can be used for

  • Backup
  • Failover
  • Read scaling, and more

Read scaling could be really interesting from a BI consumption point-of-view eg a peak of user traffic to the DW portal at the beginning of the day.

In MongoDB the most basic setup is to start a master node (in my case the Dell 5100)  and add one or more slave nodes (in my case, the Raspberry Pis) Each of the slaves must know the address of the master.

To start the master run: mongod –master

To start a slave run: mongod –slave –source master_address
– where master_address is the address of the master node just started. This is where my previous post on fixing a static IP comes in handy.

First, create a directory for the master to store data in and choose a port (10000)

$ mkdir -p ~/dbs/master
$ ./mongod --dbpath ~/dbs/master --port 10000 --master

Now, set up the slave(s) choosing a different data directory (if on same/virtual machine) and port. For any slave, you also need to specify who the master is

$ mkdir -p ~/dbs/slave
$ ./mongod --dbpath ~/dbs/slave --port 10001 --slave --source localhost:10000

All slaves must be replicated from a master node. It is not possible to replicate from slave to slave.

…As soon as my 32MB SD cards arrive in the post and I install MongoDB on the remaining 4 R PIs I will give this a go!

Replica Sets

replica set is the same as the above but with automatic failover. The biggest difference between a M-S cluster and a replica set is that a replica set does not have a single master.

One is ‘elected’ by the cluster and may change to another node if the then current master becomes uncontactable.


There are 3 different types of nodes which can co-exist in a MongoDB cluster

  1. Standard – Stores a complete, full copy of the data being replicated, takes part in the voting when the primary node is being elected and is capable of being the primary node in the cluster
  2. Passive – As above, but will never become the primary node for the set
  3. Arbiter – Participates only in voting. Does not receive any of the data being replicated and cannot become the primary node

Standard and passive nodes are configured using the priority key. A node with priority 0 is passive and will never be selected as primary.

I suppose in my case if I had decreasing SD cards, or a mix of model A (256 MB) and model B (512 MB) Pis, then I could set priorities in decreasing order so the weakest node was never the master and always selected last/lowest priority.

Initializing a set (pp132)

(Networking) Success!

With some help from my former colleague and current classmate Pete Griffiths, I managed to remote logon to MongoDB installed on the ‘clear’ Pi (with the 32GB SD Card & successful GitHub installation) via MongoVue installed on the Win7 laptop.

This was a breakthrough as I’m now confident my cluster will be able to see each device – which then allows me to begin spreading data across nodes aka sharding.

Node(s) visible

Node(s) visible

Here you can see a connection to ‘clear’ has been created. Clear has been given a fixed IP address of 10.0.0.2, yellow has been given a static IP address of 10.0.0.3, Red .4 etc etc. MongoVue is running on my laptop, but able to connect to remote devices in the network switch.

You can see the dummy document I entered into a new collection!

Image

Clear is plugged in to the TP-Link switch on port 3 (lit up; laptop in port 1).

I’m just waiting for my other 4 32GB cards to come in the post and then I should be able to install Mongo on the remaining R Pi’s then hook everything together into the network switch.

We also linuxed the old Dell using Unetbootin, removing WinXP which is incompatible with MongoDB. Raspbian is crafted for the puny ARM processor, so I had to install Debian, which I believe(?) is from the same Linux family, so I hope has more or less the same functionality and syntax,

Also created virtual machines on the laptop using Virtual Box. I think I’ll need these to create virtual ‘config servers’ which mongodb requires for coordination. Config servers store all cluster metadata, most importantly, the mapping from chunks to shards:
Config servers maintain the shard metadata in a config database. The config database stores the relationship between chunks and where they reside within a sharded cluster. Without a config database, the mongos instances would be unable to route queries or write operations within the cluster.

– see more here

Divide and conquer

MongoDB Semantics

Now, I need to begin losing my relational vocabulary and start talking Mongo !

Some useful additional background here:
The MongoDB query language is not SQL, but 10gen describes it as a simple, expressive language with a straightforward syntax for efficient querying. Examples of simple query statements include “sum,” “min,” “max,” and “average.” These sorts of operators would be familiar to any database veteran or analyst, and they’re applied in a real-time data-processing pipeline that delivers sub-second performance, according to 10gen.

Other available query statements include “project,” which is used to select desired attributes and ignore everything else. “Group” lets you combine results with desired attributes. “Match” is a filter than can be used to eliminate documents from a query. “Limit,” “skip” and “sort,” are statements used in much the same way they’re used in SQL: to limit a query to a desired number of results, to skip over a given number of results, and to sort results alphabetically, numerically or by some other value.

SQL Terms/Concepts MongoDB Terms/Concepts
database database
table collection
row document or BSON document
column field
index index
table joins embedded documents and linking
primary keySpecify any unique column or column combination as primary key. primary keyIn MongoDB, the primary key is automatically set to the _idfield.
aggregation (e.g. group by) aggregation frameworkSee the SQL to Aggregation Framework Mapping Chart.

And query operators

SQL MongoDB
WHERE $match
GROUP BY $group
HAVING $match
SELECT $project
ORDER BY $sort
LIMIT $limit
SUM() $sum
COUNT() $sum
join No direct corresponding operator; however, the $unwind operator allows for somewhat similar functionality, but with fields embedded within the document.

+ Some example query statements

SQL                                                           MongoDB

SELECT * FROM users

db.users.find()
SELECT *
FROM users
WHERE status = "A"
db.users.find(
    { status: "A" } )
SELECT *
FROM users
WHERE status = "A"
OR age = 50
db.users.find(
    { $or: [ { status: "A" } ,
             { age: 50 } ] } )
SELECT *
FROM users
WHERE age > 25
AND   age <= 50
db.users.find(
   { age: { $gt: 25, $lte: 50 } } )

And some really helpful analytical scenarios here

Patterns


How to install MongoDB on a Raspberry Pi…Really!

/Update 25 Sept – some handy links/
http://raspberrypi.stackexchange.com/questions/4883/how-can-i-build-mongodb
http://raspberrypi.stackexchange.com/questions/4883/how-can-i-build-mongodb/4914#4914

My 4th Pi arrived today, with an SD card pre-loaded with the O/S. Gave me the opportunity to try a ‘fresh’ config, after making several botched attempts not fully knowing what to do previously.

Write the Raspian Operating System to the SD card

Copy the latest O/S from the R Pi website.
If you haven’t already, get the image writer software for Windows
(
Download the binaries, not the source)
Extract the zipped O/S archive. Find the image file from within the image writing software. Write to the card (takes 5 mins or so).

Modify initial config settings

On 1st boot, I changed the following default settings. I also repeated some of these below, manually. Following great advice from Chris Elsmore, and his blog

  • Expand rootfs – expand the root partition to fill the SD card
  • Overscan – enabled
  • memory_split – how much memory should the GPU have? I set mine to 32 of the 512MB as I won’t be running graphically intensive apps. I hope this frees up most of the resource to run MongoDB
  • ssh – enabled
  • boot_behaviour – start desktop on boot
  • update – could not resolve mirror sites etc (I assume config for eth0 connection needs to be done?)

Change Hostname:

I also changed the hostname of my Pi, each of the 5 are housed in a colured plastic case.

Change hostname to match case - keep it simple!

Change hostname to match case – keep it simple!

$ sudo nano /etc/hostname

- this opens up a texteditor containing 1 line. I changed 'raspberrypi' to 'yellow' “CTRL+O” then “Y” to quit) 

$ sudo nano /etc/hosts

– again, this opens up a texteditor. this time containing 8 lines. Replace the last line (mine had ‘IP 127.0.1.1 raspberrypi’ ) with the hostname you chose above ie ‘yellow’

$ sudo /etc/init.d/hostname.sh start (to enable the changes).

The prompt should now say pi@’newhostname’ in my case pi@yellow. A further check is to run the command
$ hostname

Enable SSH:

SSH lets you remote login to a Pi. I haven’t yet needed to do this as I have >2 HDMI ports on my monitor, so just flip between video inputs.http://ts1.mm.bing.net/th?id=I.4650776073995288&pid=15.1&W=160&H=160

$ ssh-keygen (I hit enter for all three options to accept defaults and no passphrase)

$ sudo service ssh start (to start sshd)

$ sudo update-rc.d ssh defaults (to run the ssh server on startup by default)

>>Generating public/private rsa key pair
>>Enter file in which to save the key (/home/pi/.ssh/id_rsa)
>>Enter passphrase (empty for no passphrase):
>>Enter same passphrase again:
>>Your identification has been saved in /home/pi/.ssh/id_rsa
>>Your public key jas been saved in /home/pi/.ssh/id_rsa.pub.
>>The key fingerprint is: [a long string!]

$ sudo service ssh start (to start sshd)
>>[ ok ] starting OpenBSD Secure Shell server: sshd

$ sudo update-rc.d ssh defaults (to run the ssh server on startup by default)
>update rc.d: using dependency based boot sequencing
>update rc.d: warning: default stop runlevel arguments (0 1 6) do not match ssh Default-Stop values (none)

Now to config an internet connection so I can try to install MongoDB on this ‘fresh’ card.

Config an internet connection:

http://ts4.mm.bing.net/th?id=I.4520067346075075&pid=15.1&W=113&H=160You’ll need to get out on to the internet so that the Pi can see the various mirrors and repositories it used to pull down updates.

$ dmesg | grep ^usb
$ dmesg | grep ^wlan
$ dmesg | grep ^wireless
$ dmesg | grep ^firmware

One of these commands should indicate the manufacturer of your USB wireless adapter. Mine (from Maplin) was “Ralink

Search the library for the appropriate package
$ apt-cache search ralink

Install the package
$sudo apt-get install firmware-ralink

Now create a config file to specify what type of encryption your home router has, necessary IDs, passwords etc
$ sudo nano /etc/network/interfaces

Add the following three lines to the bottom of the file (ignoring the numbers)
1. auto wlan0
2. iface wlan0 inet dhcp
3. wpa-conf /etc/wpa.conf

CTRL+X to save

The last line makes ref to a config file, wpa.conf which needs to be created. The file will be used by wpasupplicant, designed to provide Linux with an easy way to connect to networks secured with by WPA (most home commercial broadband networks I guess).

$sudo nano /etc/wpa.conf

>>network={
ssid=”BTHub3-WFF6″
key_mgmt=WPA-PSK
psk=”nnanananna”
}
* This is specifically my home SSID. My password is a combination of 10 alphanumerics *

The Pi’s wireless network is now (supposedly !) updated & configured, and will begin the next time the Pi is restarted. To start the wireless network without rebooting

$ sudo ifup wlan0
To make sure it’s working

$ ping  -C  1 http://www.raspberrypi.org
ping: unknown host http://www.raspberrypi.org

In my case, things weren’t working, so I flipped over to the desktop to use the wifi config utility. On doing so, I could see the home broadband network and it was then easy to connect.

$ startx
To start the windows desktop emulator
Run the Wifi config programme, click the scan button, connect to the relevant network, provide any required info.

Install MongoDB via GitHub

Because of the limitations/power of the Pi (it is £30 after all!), you need to get the version that has been specially created for the R Pi.

Source control/repositories

Install the requisite packages on the Pi

sudo apt-get install git-core build-essential scons libpcre++-dev xulrunner-dev libboost-dev libboost-program-options-dev libboost-thread-dev libboost-filesystem-dev

I could not get this to execute successfully as a single script, so instead install each individual component one-by-one

$sudo apt-get install git-core
….
$ sudo apt-get install libboost-filesystem-dev

This seemed to work better.

Check for any updates to these
$ sudo apt-get update

Pull the files from this fork on Github:

git clone git://github.com/RickP/mongopi.git

Build it (this took about four hours!):

cd mongopi
scons

you’ll see lots of these lines as the build progresses for several hours…
{standard input}: nnnnn: Warning: swp{b} use is deprecated for this architecture

Install it (this took about 3 hours)
https://i0.wp.com/www.javaplex.com/blog/wp-content/uploads/2011/07/MongoDB.png

$ sudo scons --prefix=/opt/mongo install

This will install mongo in /opt/mongo. Takes several hours. To get other programs to see it, add this dir to your $PATH:

Check the filepath where mongo is executed
pwd = present working directory

$ PATH=$PATH:/opt/mongo/bin/
$ export PATH

While you’re waiting for everything to install, take a look at the primer/tutorial on MongoDB on CPAN

All looks good….

Now. I can at last fire up MongoDB on the Pi! Or, so I thought….

pi@clear ~/mongoppi $ mongod
 ERROR: dbpath (/data/db) does not exist
 Create this directory or give existing directory in --dbpath
 , terminating

So, I assume I need to create the directories
sudo mkdir -p /data/db
mkdir: cannot create directory ‘data’ : No space left on device

Check disk usage
$ df -h
Reveals that the SD card is completely full.

I run scons -c to clean up any temp files hanging around after the installation. This frees up just 573M. That doesn’t feel like sufficient room to get some data on, and I’m also suspicious the install has really worked, given it seems to have taken all the space. So, time to experiment with some larger cards!

http://ts1.mm.bing.net/th?id=I.4937349179376252&pid=15.1&W=160&H=156Got a 32MB SD card from Maplin from 19.99. Re-ran the install. Looks promising. Cheapies can be found here
/rootfs
/dev/root
– Now both have 27G (94%) of 30G spare. That should give me 125GB or so across the array of five R PIs. One GB equates to about 1000 thick books.

Scan for the 20 largest files, perhaps there are some temp install files that can be cleared up.

#du -a /var | sort -n -r | head -n 20

Create the necessary /data/db
mkdir -p /data/db
try mongo again

Returns error: [initandlisten] exception in initAndListen: 10309 Unable to create/open lock file: /data/db/mongo.lcok errno13: permission denied Is a mongo instance already running?, terminating

Check to see if any mongod instances are running
$ps -ef | grep mongod
– Suggests none are.

Therefore I suspect it is some kind of permissions conflict as the /data/db directory was created as ‘root’.

Seems like I’m not the only one to experience this common problem
$ sudo chown $USER /data/db
Seems to do the trick!

Configuring network access between devices / creating a lan

Now that Mongo is installed and you have updated packages, configured the PIs etc. It’s time to connect them all into a network hub/LAN. My primary device is my laptop, running windows 7. This is connected over Wifi to a BT router. It is this information that needs to be propagated to the R Pis. Thanks to instructions on Simon The PiMan’s blog.

> ipconfig /all|more
This pipes ipconfig information out 1-page at a time and can be tabbed through by pressing the spacebar.

Page 2 has the information required. The two important bits of info we need for setting up a Raspberry Pi with a fixed IP address are (1) Default Gateway which is the router to access the internet, in my case it has an IP address of 192.168.1.254 and (2) IP address, which is 192.168.1.86

As you can see, Default Gateway has the same IP address as for the DHCP server  – I believe this means local addresses will be allocated by the same router (although my knowledge of networking is low!)

As my I.P. address is 192.168.1.86 and also uses DHCP then the use of addresses greater than 192.168.1.200 is unlikely to clash with the DHCP server, so i will start the five Raspberry Pi’s from this point.

My network is 192.168.1.0 as the home local network is usually the 1st 3 parts of the IP address plus a 0 (but this is dependant on the Subnet Mask, usually irrelevent for most home users – and i’m out of my depth now)

So to conclude – My 5 Pis needs the following items to be setup within my LAN.

1 has yet to arrive!
Hooking in the 5 R PIs into a home LAN

——————————————————
address   192.168.1.200
# The first 3 digits of the gateway plus a Unique number per machine up to 254,
# Starting at 200 as it gives me 54 potential Pi addresses (max is 254)
netmask   255.255.255.0
# Highlighted in step 2 Subnet Mask
network   192.168.1.0
# The first 3 PARTS of the gateway plus a 0 ending
broadcast 192.168.1.255
# The first 3 PARTS of the gateway plus a 255 ending
gateway   192.168.1.1
# Highlighted in step 2 Default Gateway

[ ~memo: not sure where this info gets written to (yet) ]

NOTE:- Details of your ADSL router are specific to the router so you will need to look at the documentation for the router if you want more details, and will also need this *to enable a DMZ for your Pi to run from*.

Creating a LAN. Use colour coded ethernet cables. It all gets rather messy after a while!

Hopefully all the network stuff is more or less done now, which should enable me to hook everything up and get things ‘talking’. The fun hopefully starts when I can start using MongoDB to shard data across each Pi node!

Sharding with MongoDB

Sharding with MongoDB

Big thanks to Simon & Chris for their generous help!

Update 02 April 13
Just noticed a new link/site
http://andyfelong.com/2013/02/raspberry-pi-meets-mongodb/

R Pi / Linux headaches

Attempted to download the firmware for the Pis. Real hassle having to hook up directly to the router and cart everything up and down the stairs! Maybe i ought to prepare an ‘image’ myself and put it onto the PI’s SD cards manually?

Also trying to download & install windows 7 on the Dell 5100 (update from XP as MongoDB doesn’t run on XP), but so far the download via Dreamspark (students) has taken 1/2 a day and keeps crashing at 48% then failing on restart. Microsoft can’t seem to give their software away for free!

Gonna try installing Linux on the old dell now instead.

All this config stuff is really holding me back!

Pi config/setup

Thanks to some great suggestions & help from Simon via his blog
I managed to ‘see’ a Pi alive. Looks like the O/S is good and now I just need to run some updates/config.

For some reason, I could not see the RPi on my laptop. I can on an HDMI TV. Turns out both the laptop and Pi are HDMI *out* only – this is why it works on a TV with an HDMI input.

[Note to self (after a very expensive ethernet and ‘gold plated’ 3m HDMI lead from Asda) Farnell is *far* cheaper for everything needed than Maplin, Asda etc]

So, tomorrow, I’ll be buying a powered USB hub so I can connect a mouse and keyboard to the PIs, and the Pi to the bedroom TV(!) and begin the O/S stuff.

Painful progress today, but progress nontheless.

Simon also recommends XMing for emulation/control.
– I guess i’ll be battling with that soon!